Introduction
In this article we are dedicated to the fabled theme of compression. You may not know every peculiarity of a particular compressor plug-in or a hardware compressor at first glance. However, attentive reading will help you to understand the application and basic operation of a compressor and its influence on dynamics. We show you the most common parameters of the compressor: threshold, ratio, attack, release, knee and output gain. In addition, we provide an overview of the various compressor variants, the tube compressor, the optical compressor, the VCA compressor and the FET compressor.
Imagine the following scenario: you are currently working on your song and you record a vocal track for it. The timing is right, the intonation is right, but there is one crucial thing that robs assertiveness: the volume difference within the vocal track. Naturally there are conscious and unconscious differences in the volume of a signal, in our example the voice. These differences are called dynamics, the area between the softest and loudest parts is called dynamic range.
And this is where the compressor comes in: it limits the dynamic range and adjusts the signal's variations to create a more consistent loudness. Compression can help you make your sound more assertive and add a nice coloration depending on the compressor. On the other hand, over-compressing can rob any dynamic and destroy your sound. So use it carefully!
The compressor as a tool to control the dynamics
Basically, today you can distinguish between two types of compressors, the hardware or outboard compressors and the computer-based software compressor plug-ins. The compression parameters are usually the same, so I'll explain the most common ones below.
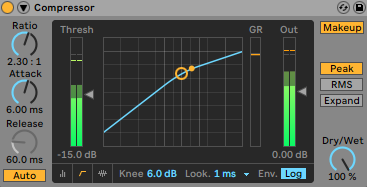
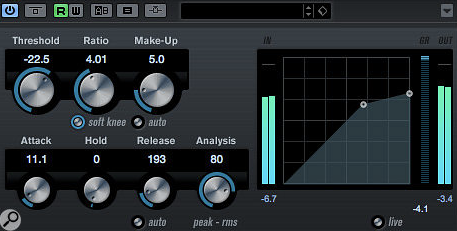
Threshold:
The threshold setting adjusts the volume of the incoming signal (dB values are given) from which the compressor should make the signal quieter. If you turn down the threshold knob, the higher, louder part of the signal is adjusted down in volume. If you set the knob to the lower end of the minus range of the scale, the quietest parts of the signal will be even further reduced.
Ratio:
The ratio setting determines the proportion of which the incoming signal, which is above the set threshold value, should be lowered. Take for example a threshold at -30 dB, an incoming signal of -10 dB and a ratio of 2:1. The signal is thus 20 dB above the threshold and is processed in the ratio of 2:1 (20 dB:2 = 10 dB). So the compressed signal is 10 dB above the threshold, at -20 dB. This is a gentle form of compression, maintaining a certain dynamic range. Let's raise the ratio to 10:1 in our example. Now the 20 dB louder incoming signal, much more compressed, is only 2 dB above the threshold (20 dB:10 = 2 dB), therefore at -28 dB. We have significantly reduced the dynamic range of the signal. If you adjust the ratio to infinity (∞:1), the signal can not exceed the threshold value. This is the way a limiter works.
Attack & Release:
With these time-based settings you regulate when the incoming signal, which exceeds the threshold, starts to get compressed (attack time), and how long the signal is to be compressed until it returns to the uncompressed original signal (release/decay time). If the signal is to be compressed as quickly as possible, for example with vocals, set a short attack time. With such a setting, little time passes until the signal is completely compressed. But that does not always make sense. Especially with percussive instruments, a longer attack time usually sounds better. For example, if the attack time on the compressor of your snare or bass drum is set too short, it will have a negative impact on your transients, the first impulses of the signal. These are then trimmed unintentionally. The track will probably sound over-compressed. Here a longer attack time helps to maintain pressure and provides a more natural sound. The release time of the compressor can also have a lasting effect on the sound. If it is set too short, there will be a quick change between the compressed and the uncompressed signal. You will probably be able to hear the so-called "pumping" of the compressor. A slightly longer release time can help here.
Knee:
With the knee setting of your compressor, you can determine how your incoming signal should be processed by the compressor. You can often choose between hard knee and soft knee. In hard knee, the signal crossing the threshold is strictly compressed from the beginning in the set ratio. This setting is mostly used for percussive signals. With soft knee, the signal is already compressed slightly below the threshold. This allows a smoother transition into the actual compression. The ratio of the compression also increases gradually with the volume of the incoming signal until the full set ratio is reached. This rather gentle setting is especially popular with vocals, as it sounds natural when used properly and stays in the background.
Output Gain:
You use the compressor to achieve a more consistent, pleasant volume of your signal. So far, the steps in signal processing by the compressor have made your signal more consistent but overall quieter. With the output gain or make-up gain you can adjust the compressed signal to the desired volume.
Common Compression Types
As mentioned in the beginning, there are countless types of compressors. For some long time, some cults and myths have formed around some hardware compressors because they color the sound in a certain way or have special features. Let's take a quick look at the differences between the most common technologies.
Tube Compression:
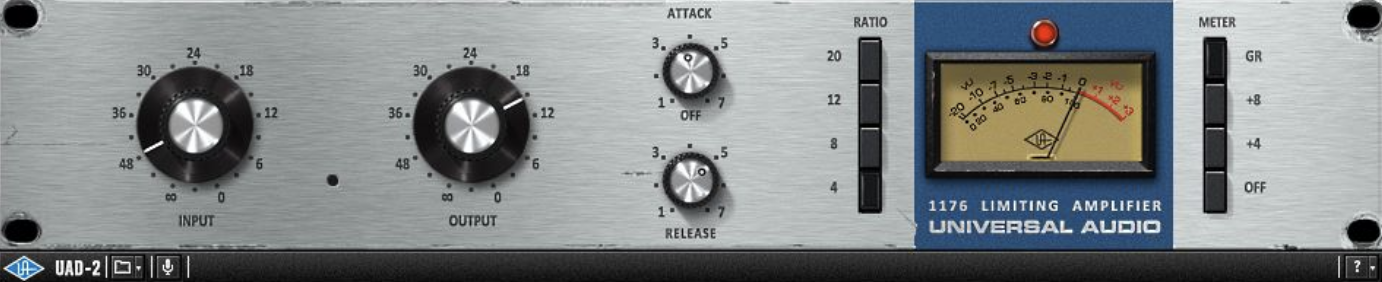
The tube compressor is the veteran of compressors. Due to its design, it reacts relatively slowly, but is even more convincing due to its warmth, musicality and vintage effect. Classical tube compressor models are Universal Audio 1176 Compressor/Limiter
Optical Compression:
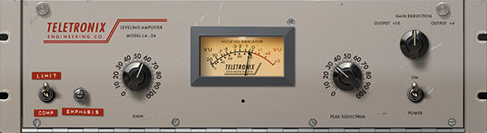
In optical compressors, the compression of the signal is controlled via an optical unit. The louder the incoming signal, the brighter a light unit shines. An optical transistor controls the amount of compression after detecting the light intensity. Slowly in the reaction he delivers a unique sound that can refine some track.
Classical optical compressor models are Teletronix LA-2A,Tube-Tech CL 2A
VCA-Compression:
The VCA compressor is based on transistor technology. Here, the voltage of the incoming signal serves as the basis for sound processing. It reacts very fast and the common parameters can be adjusted exactly and without coloring effect, which makes it universally applicable. VCA-compressor models are DBX 160A, Universal Audio Neve 33609

FET-Compression:
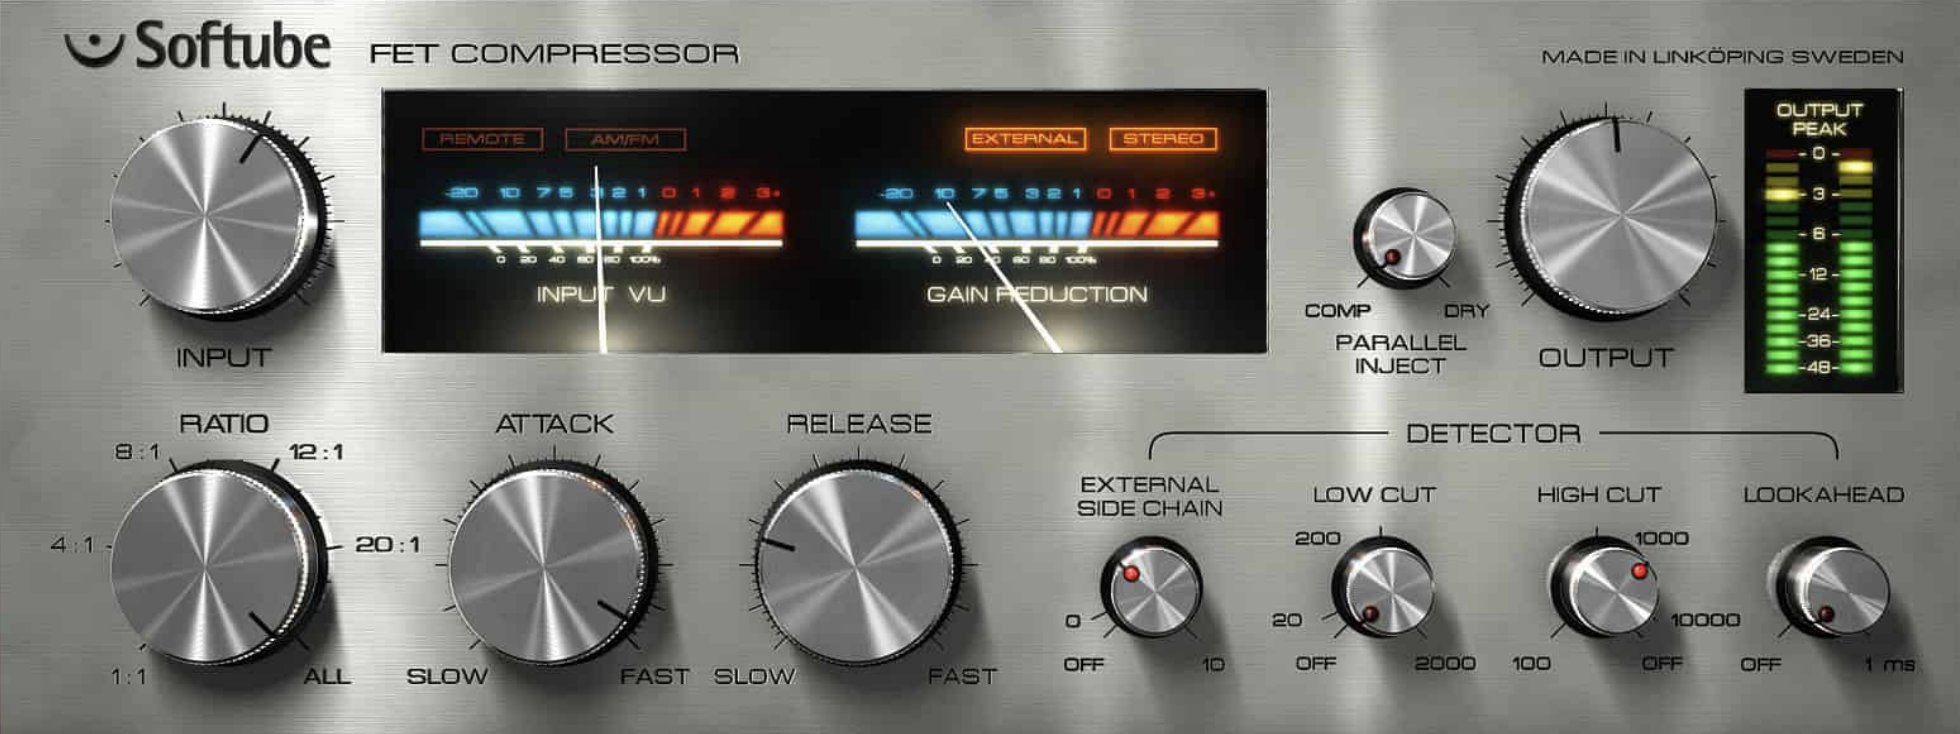
The FET compressor combines the best of different worlds. The reliability, speed and usability of the transistor technology, coupled with emulation of a warm and coloring tube circuit. Classical FET-compressors are Universal Audio 1176LN, Drawmer 1973, Softube FET compressor
Tips & Tricks
As with most things in music production, there is no magic recipe. However, I'd like to give you some tips that can improve your approach to the big field of compression.
1. Think before use, why exactly you want to use the compressor. Not every track automatically requires compression.
2. If you have decided to use a compressor, try to understand your track in advance to get used to the particular setting.
3. When in use, adjust the settings carefully to ensure that you are not over-compressing and your signal continues to sound natural.
4. Compare the compressed with the uncompressed track and hear what the compression is doing. Make sure that the output gain of the compressor is set correctly, as a louder signal always sounds better in doubt than a quieter one.
5. Today's compressor plugins of your DAW are doing great jobs, their applications are very diverse. Think about it and learn it inside out, before you buy any more.
6. To make your kick cut through the mix, keep the bass range free with a sidechain compressor.
7. Keep an eye on the needle of your compressor's VU meter. If it moves with the music, the correct attack and release setting is probably already close.
8. Low frequencies carry a lot more power than high frequencies. They’re a lot harder for a compressor to work with, so apply subtractive EQ before compression.
9. Using multiple compressors in a row (especially on vocals) can sound more musical and subtle.
10. For consistent vocal sound, combine compression with automation.
As always, have fun trying it out!
