Introduction
Another important topic in your music production is the stereo image of your track. Nobody likes muddy sound. We're all probably working towards a transparent sound where every detail can be heard in the room. But how do you ensure that every element in the mix finds its place and isn't masked by others? What's the difference between Balance and Pan? In the following article we'll look at how panning can clean up your production and take it to the next level. The basics will be clarified using the spatial division of common tracks in the mix and you will get some helpful tips and tricks for your audio production.
The following situation is familiar to most learning, but also experienced music producers: every single track of your music production has been carefully edited, levelled, and its frequency spectrum adjusted with the equalizer. But when you listen to the production you notice that it sounds muddy, some elements fight with others for their place in the mix and again others seem to disappear completely. How can that be?
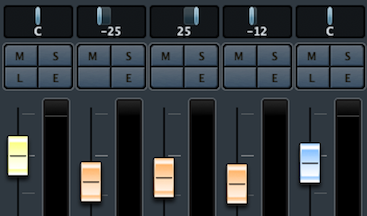
If you haven't panned your tracks, they're all in the center of the sound field. And that could be the reason that your sounds can't find a place in the mix, because panning does the following: it distributes your audio signal in the stereo or multi-channel (surround) sound field.
Panning as a tool to control the stereo image
Let's clarify the function of panning by a common misconception. Often the term balance is used synonymously with pan, which is simply wrong. There is a fundamental difference here: You can usually find a balance control on your stereo system or other source with which you listen to music. With this knob you control how much audio signal is sent to each output. If you turn it completely to the left, the input signal is completely routed to the left output channel, regardless of the underlying stereo mix of the signal. If you turn it to the right, it will be sent the other way round to the right. Since the mix of the incoming material remains untouched, nothing is changed in the actual stereo field of the music. The Pan knob does something completely different: it actively determines the position of the selected input in the stereo field - again regardless of whether the balance knob is turned left, center, or right. With this knowledge in mind, we can now consider where to place some elementary components of most music productions in the stereo field.
Panning instruments in the mix
Bass Drum:
Start by positioning the bass drum in the centre. Low frequencies are less directional than higher frequencies and carry the most power in the mix. Therefore a very central position in the stereo field will most likely be correct for your bassdrum as well.
Bass:
You should also place the bass as centrally as possible at the beginning. The same applies to it as to the bass drum, with which it forms the foundation of your mix and represents an elementary component of the rhythm section.
Toms:
Because toms usually carry a lot of energy, they quickly distract and are perceived as annoying when placed far out on the sides of the stereo field. With an acoustic drumset, the toms are not too far from the centre. If you keep this in mind, you are moving one step further towards a natural sounding, good drum sound. However, if you want to use it as an effect, you can experiment with it and create impressive stereo effects.
Snare:
Start with a central position of the snare. If you want to create a little space for the vocals, you can also set them aside a little, but you should keep in mind that they have an elementary part in your rhythm section.
Hi-Hat:
As sounds in the higher frequency range, hi-hats do not carry much energy and are much less problematic in panning than, for example, toms or the bass drum. Depending on your taste and personal listening preferences, you can pan the hi-hat less or more outwards. In this way you create additional space, for example for the vocals or other elements you want to emphasize, without the hi-hat losing its presence.
Synths:
As with many components of your mix, the positioning of synthesizers is a matter of taste and depends, among other things, on whether the synthesizer plays an important or rather subordinate role in the production. You'll probably like a lead synth more centrally than on the sides, while an athmospheric pad creates extra width if it's more on the side. If you have panned generously in your mix, try filling in any possible gaps in the stereo field with the synth, you will be surprised at how the sound thickens.
Vocals:
The lead vocals belong as a central part of your production in the centre, because here they can assert themselves best. Backing vocals are a bit different, here you can experiment a bit. If they are far out you have a bigger stereo effect, but run the risk of losing the connection to the main vocals. If they are too central, the individual vocals can mask each other and the mix loses its width. You have to find a good average here.
Tips & Tricks
As with most things in music production, there is no magic recipe. However, I'd like to give you some tips that can improve your control of the stereo field.
1. Regularly listen to your mix in mono to make sure that elements do not cancel each other out
2. Extend your stereo spectrum by panning backing instruments and drums left and right.
3. Create variety and get the listener's attention by panning an element panned to one side to the other side in the next part.
4. If you want to briefly highlight an instrument, create an automation that shifts the direction to the center of the stereo field.
5. Don't overdo it with the panning. If a track gets too wide, it can lose punch.
As always, have fun trying it out!
